Sunday, 28 November 2010

Editing

After uploading the footage from the previous shooting, we went on to edit the interviews. In order to make Lydia a darker silhouette in her interview, I double clicked the clip and changed the 'Exposure' from 100% to 234%.


We then added the title 'Gradient - Black' to the scene to show the audience who is talking and to give them a little bit of information. In this case, we have not provided the victim's name because we have chosen to keep her anonymous, so we have said this in the subtitle bar.


 This is how it looked once we edited the lighting and added a title.

Second day of filming

Earlier today we started filming with our actor and actress - Lydia and Elliot. Tilly and I used Elliot in our film 'Prey' last year so we knew he would be the best person to use as we knew what we was capable of and wouldn't waste time with someone that wasn't any good.
Unfortunately though, Elliot couldn't stay long to film due to other priorities so with the time we had with him, we practised his scenes which we recorded in case they were any good. We filmed Elliot attacking Lydia outside as the re-enactment of the CCTV footage. They did a really good job but I felt we didn't get enough camera angles as I would have liked, and it was a bit too dark so the visibility was quite low.. Next time we film it I would like to perhaps use a light to enhance the lighting. We used Tilly's phone light but I don't think this was effective enough. 

Once Elliot left, we made use of the time we had with Lydia by filming her interview. In lesson we previously planned to make the 'victim' remain anonymous, as it would show a variety of different interview techniques and skills, as we would need to make her figure look like a silhouette. To achieve this, I brought along a floodlight from my house which we placed on a table behind Lydia facing the wall to light it up, whilst we turned the room lights off. This was really effective as Lydia was all blacked out so we almost completely couldn't see her, although we may need to edit the lighting a little in tomorrow's lesson to make sure she is completely dark.


Lydia did a great job and we got the scene on the second shoot. We are eventually going to split  the scene into separate clips and place it in between the CCTV and re-enactment footage, with the dialogue from the interview playing throughout most of the film as a narration.

After this was done, we filmed the interview from the "friend's" point of view. For this, we used Tilly as she does drama at A Level so is good at acting. We only need a short clip of her talking about how she felt about the attack of her friend etc.


Scroll over the images below to zoom in to them. I made this on www.photobucket.com


Friday, 19 November 2010

Editing CCTV footage

Today my group and I uploaded and edited last night's filming. After looking into different types of CCTV footage, I knew which kind of style I wanted to go for - black and white. To do this I double clicked the clips I wanted to change and selected the 'Black & White' option. This looked good, but it seemed too clear. 


In most CCTV pictures I have seen, the image is not usually very clear so to do this we adjusted the Video effect - found on the second tab of the window after double clicking the clip. We then adjusted the exposure which made the image lighter and therefore a little more distorted and blurry.


We then noticed that the handle of the window we were filming out of was in the shot at times, so we cropped the shot so that it could no longer be seen.


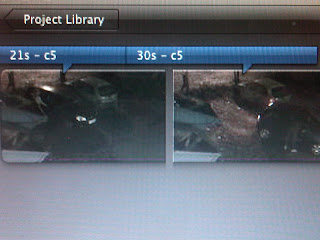
We then inserted the title named 'Upper' and filled in the date, time and camera number - I got this idea from some of the CCTV images I have found whilst researching. For the first scene, I put 'C5', short for Camera 5, then the time, with '24H' after it to show it is a 24 hour clock, then the date.


Once this was done, we watched the clip back and I felt something was missing. In all the images of Google of CCTV footage, the time always included seconds, and without the ability to do this on the effects I offered to make each title 1 second long and change the time, with the seconds increasing in each one. This took some time but once complete, it looked really good.


I did this by changing the duration to 1 second. I then switched the 'Fade In/Out' to manual and put it to 0.0s. This way, each title linked together without a gap in between which looked very wrong before we fixed it.


Finally, I searched through the fonts to find one which I thought matched the real ones I had seen. 'Synchro LET' was the most convenient. 


Types of existing CCTV

In order to turn our footage into what looks like a real CCTV image, I did some research into the way existing CCTV looks. These are the different styles I found...


This CCTV camera clip is in colour, with a green tinge.
It has lettering on it: 'C35' which stands for Camera 35. It also has the date and time


This clip is also in colour, with a ring around the suspect for TV purposes to help the viewer find the person quicker. 
Again, it has the date and time, but due to the larger room than above, the people are smaller which is why a ring was used


This camera is shot at a longer angle than the two above. Again, it is in colour and shoots quite a wide and long area. Like the others, it has the camera number, date and time


This one is a very wide and long shot, in vivid colour.
The suspect is placed in a circle of the image zoomed in, possibly to show viewers a clearer image of his face so he can be found. There is no text on this clip


I really like this way of showing CCTV footage. It is from different angles of the bus on a screen split into 4 sections. It gives a better image of the scene as it can be seen from different corners of the bus. It is also in black and white which I believe is more common for CCTV cameras and makes it look more like one. It also has text at the bottom of each camera image

Thursday, 18 November 2010

First day of filming

To begin filming, we first had to have a written and signed consent form from on of your parents to show our teacher that we will be taking full responsibility of loss or damage for any equipment we use. 


The equipment we will be borrowing and using from the Media Department is a Sony HDD Handycam and a tripod - along with a Mac to upload and edit.


Today Tilly, Matt and I begun filming. Our main actress wasn't available today so we thought instead of wasting the opportunity when we were all free, we filmed the CCTV clips from the school car park. We filmed from two different angles, because most buildings have more than one security camera. This way the audience can view the assault from different angles which I have seen on some episodes of Crime Watch.


The view from the window we filmed the CCTV footage from


We started by finding the best locations to place the cameras in order to get the right angles. Once these were found, we tested out different ways for the scene to go, by moving my car in order to find out which location was best to park it in order for the victim (me) to get in it before she gets attacked. Because it was dark, the positioning was crucial as otherwise I would not have been very visible.